12.10.2010

Jessica's Winter Wonderland Wreath

Here is Jessica's sparkly and fantastic version of the Modern 3D Wreath. I'm in love!

Isn't it absolutely stunning?


Beautiful job Jess!

Linked up at Craft-O-Maniac

12.07.2010

Linky Parties We Party With!

Mondays!
*Before&After Party-1st Monday of the month
*The DIY Showoff Project Parade
*Metomorphosis Monday
*Made by You Mondays
Just Something I whipped up Monday
Making the world cuter Monday
Tools are for women too
Market yourself Monday
Motivate Me Monday
Mad in crafts
Craft
*The CSI project
Craftomaniac
Menu Plan Monday

Tuesdays!
*Get Your Craft On
Anything Related
Oops I craft my Pants off
The gypsy corner
Take a look Tuesday
Tasty Tuesday
Show and tell

Wednesdays!
Pinching Penny Party
Power of paint party
Blue Cricket Design
Creations By Kara
We are that Family
Somedays Crafts
My backyard Eden

Pom Pom Christmas Tree Skirt!

For the past 6 Christmases, my tree skirt has been the skirt we had under our tree growing up. It was a salmonish-red, and featured a charming little Christmas scene with Panda Bears dancing around a Tree wearing dresses. So cute, right? So why would I decide to retire the pandas? Well, it was just time.

I have always been a HUGE fan of pom pom trim, and it seemed so fun and classic Christmas to me! So, I grabbed about 3 yards of it, and one yard of 44" fabric. I traced a friend's tree skirt, and pinned, and sewed right sides together, being super cautious to get the trim straight. Adding batting to the inside and some quilting stitches would be another option, just depending on the look you want.

With the slit down the "back" of the skirt, I just added velcro to three parts for a closure.

I'm so happy with it! It's subtle, as a tree skirt should be, but very rich and fun!

Now, to add more presents...
Merry Christmas!

12.02.2010

Complete Quiet Book... Just In Time For Christmas!

We've done it! It's been a 3 month process, and we met together on Tuesday night to exchange and assemble our pages. It was so exciting to see all the beautiful work and to see it all coming together! I recommend this to anyone thinking of doing a quiet book. See the end of this post for any details on our Quiet Book Project, and click here to see a tutorial on the QB cover.

Enjoy!

Button flowers: Amy


Jonah and the Whale (zipper whale mouth): Glori
Noah's Ark (snap ark door with animal slot): Tori


Street Scene (velcro garage): Jessica
Cupcake Decorating: Emily


Mailbox and Letters: Blair
Football Laving: Michelle


Treasure Chest (lock and key to open chest): Shannon
Weaving Strips: Sarah


Colorful Kites (snaps to matching color): Kadee


Shapes (snaps to matching shape outline): Jen
Barn and Finger Puppets: Natalie L.


Tic Tac Toe- Natalie M.


The idea was that we would all have 14 different pages for our children's quiet book, while only having to buy the materials and design one! We all made duplicates of one page. We had matching criterium, such as page size and medium. I set the completion date for 3 months, and I wouldn't recommend doing it in any less time since I actually enjoyed myself doing this-- taking my time, finding materials on sale, etc.

I love having this keepsake from several of my friends, and also that my children can benefit from all these girls' diverse creativity and talents! Thanks ladies-- they turned out even better than I had hoped for (sniff, sniff)!

11.17.2010

Modern 3-D Wreath

I fell in love with this wreath when I first saw it on this tutorial from Tatertots and Jello. I had to make it immediately! Her tutorial is great. When I talked to her about it, she gave me some extra tips I'll share with you!

Tips:
  1. Wrap your ribbon super tight around the wreath form. This will help the dowels hold the weight of the circles that are glued to them.
  2. Use the medium size and small size circles for the highest dowel pieces.
  3. Attach circles to dowels with gorilla clue, and dowels to wreath form/ribbon with hot glue.
Good luck, and enjoy!

11.10.2010

Quiet Book Cover

Hello! I'm Shannon's sister, Tori. When Shannon invited me to be a contributor on her craft blog, I began to hyperventilate. Then when the euphoria wore off, I came back to solid ground and began sewing! You see, Shannon is my hero and all my life I've been trying to be like her. Annoying, yes, but any of you who know her can understand why I'm obsessed with this gal.

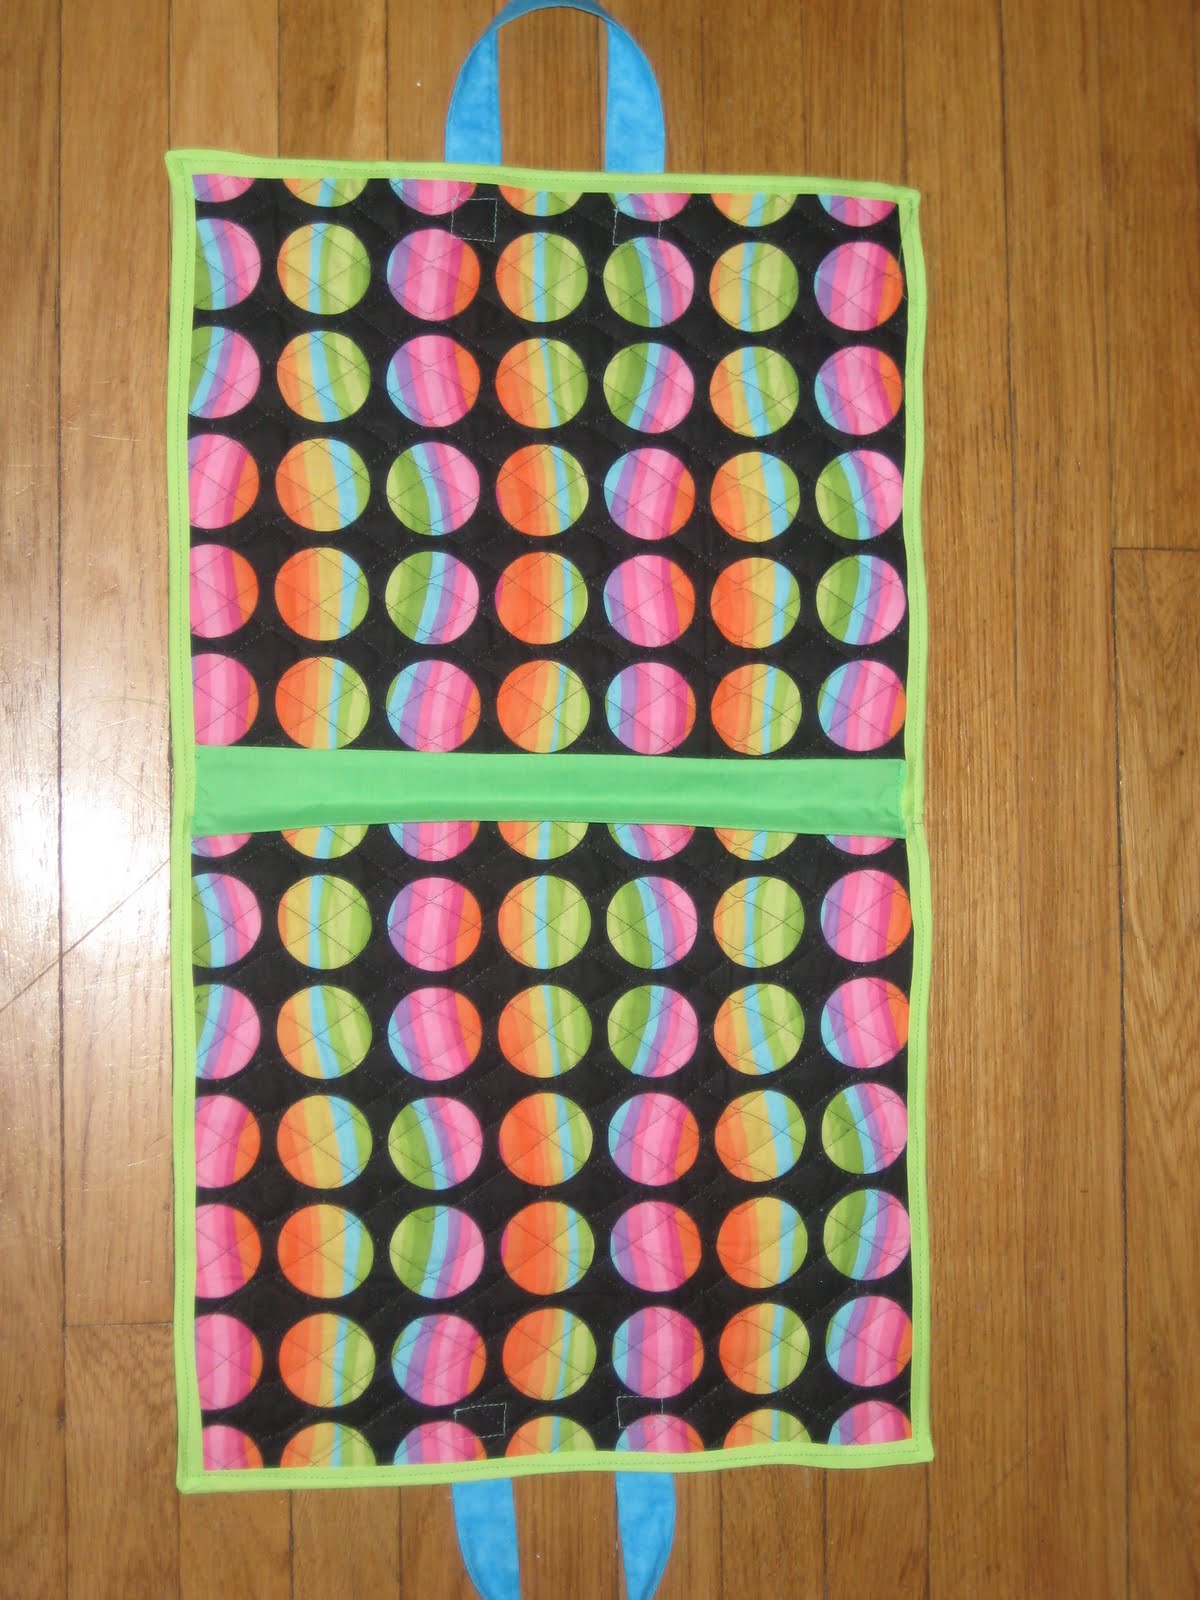
A group of friends and friends-of-friends here in St Louis joined forces to create quiet books for our kids. This post is for the 14 girls working on this project that's due on the 30th of November. Here's my quiet book cover!

It was super easy to make, and here's what I used to make it:
  • 1/2 yd. of prequilted fabric (catch this on sale at JoAnn's or use a 40% off coupon)
  • scraps of coordinating fabric (for inside spine and handles)
  • 3 yards of bias tape (wide single fold)
  • thread
  • button
  • sewing machine
Assume a 1/2" seam allowance...

Step 1: For the book, where it's pages are 10.5" x 14," cut the prequilted fabric 25 3/4" x 14"

Step 2: Cut coordinating fabric 14"x 2". Fold and finish edges. ("spine")

Step 3: Cut coordinating fabric (two times) 12" x 1.5." Fold and finish edges. (handles)

Step 4: Fold prequilted fabric in half lengthwise, and iron crease to find middle of the book for the spine.
(sorry this picture is flipped- I don't know why it kept downloading it this way. This picture shows the green "spine" that the book rings will loop around to anchor the pages.)

Step 5: Attach "spine" binding to the inside of the cover, by stitching at the top and the bottom of the book (see above picture).
Step 6: Sew on binding strip, around the entire edge of the cover.

Step 7: To attach handles, lay bookcover open with with back of cover facing up (inside is facing down). On each 14" side of the book, measure 7" to find the middle. Then, measure 1" from either side of the 7" middle mark, and pin edges of finished 12" x 1.5" strip to cover. These are the handles! The handles should be topstitched to the outside of the book.

Step 8: Sew on remaining binding strip to 7" x 1.5" piece of prequilted fabric piece. (strap)

Step 9: Attach button to book and create button hole on strap.

You're done!

I hope this made sense. If it doesn't, please email me or make a comment...

Good luck!

dtcox04@gmail.com

10.02.2010

Creepy Crawly Candy Containers

Halloween is one of my favorite days of the year so I love decorating for it. I needed a candy jar to display the cute and colorful candy corns. Do you like what I came up with?


I bought everything at Walmart. The entire project cost about $3.50.
I love the jars they sell at Wally so I grabbed one. I also bought google eyes, felt, pipe cleaners, ribbon, and of course, the CANDY!

First, I cut a oval out of the black felt.
Next, I hot glued a black pipe cleaner around the oval to make the spider look furry.
Then, I cut 2 pipe cleaners in half and shaped them to be the spider legs. I glued the legs to the back of the felt with hot glue.
After that, I hot glued on the eyes.
Once the spider was ready, I hot glued the entire spider to the jar.
I finished by embellishing the jar with the cute ribbon.
I love it!