Showing posts with label wreaths. Show all posts

9.20.2011

Halloween Wreath


 I am on a wreath kick.  I love them...I want them...I NEED them...
So I decided I would make my own Halloween wreath.
All you need is:
a wreath frame,
black satin ribbon,
and
funky Halloween color ribbon.

First, wrap the black satin ribbon around the wreath frame.  Don't underestimate how much ribbon this takes.  I used about 20 yards.


Next, take all your fun colors and cut them in pieces about 6 inches long.  I would cut one first and tie it around the wreath to make sure it's the length you want before cutting all the ribbon.


Then tie the ribbon in knots all the way around the frame.  You don't have to go in an order or follow a pattern.  I just used whatever piece of ribbon I though would look good.


And.... ta-da!  You get a funky little wreath perfect for greeting those little trick-or-treaters!


8.01.2011

Pom Pom Wreath- Tutorial

This is a super cute and fun wreath you can make from any type of wreath form! It's completely covered in these pom poms. I am already imagining how cute a white winter one will be!...


Supplies:
  • Yarn, in as many colors as you'd like (I used 5)
  • Scissors
  • Wreath form (fun if you rehab a tired wreath)
Step 1: Wrap yarn around 4 fingers. I used about 7 yards of yarn, and spread my fingers, as pictured below. Use more yarn for thicker pom poms, and spread fingers more for longer strands.

Step 2: After wrapping around fingers, pinch yarn in the middle, and place it on separate piece of yarn, which is about 8" long.

Step 3: Tie 8"yarn in knot around wrapped yarn. Leave 8" yarn pieces long.

Step 4: Snip loops on either side of knot.

Step 5: Fluff pom pom! It should look like this (sorry I switched colors).


Step 6: After you have several pom poms (I made 8-9 of each color, except for brown which I wanted only 4), begin tying them where you want them on your wreath, using the 8" strands of yarn.

Step 7: Trim all the long pieces, and enjoy!

I'm happy with it, and it only took a couple hours of yarn work during a movie. :)


BWS tips button


Somewhat Simple
Craft Junkie Too Friend

1.20.2011

Heart Burlap & Felt Rosette Wreath


Who doesn't love Valentine's Day? Well, apparently a lot of people! I, however, am hopelessly devoted to the traditions of the holiday. Never one to hate Valentine's Day (a.k.a. "Single Awareness Day"), I'm totally stoked to decorate for it each year!

I've proudly jumped on the burlap bandwagon, and love the organic-chic look of it! I know this stuff has a loyal following in many places. However, St Louis is not one of them, so this stuff is way hip to me!

So, for my first official burlap decor project, I made this ca-ute heart shaped wreath, inspired by this one on Craftaholics Anonymous. I wanted to add a splash of color with the felt rosettes. Here's what you need to make your own:
  • wire (I used a wire hanger)
  • wire cutters and pliers
  • 1/4 yard of burlap (there are many color choices)
  • 4 pages of felt
  • ribbon
  • scissors
  • hot glue gun
Cutting burlap can be tricky, so I learned a lot from this link, also from Craftaholics Anonymous.

Step 1: Using pliers, take your wire (or hanger) and form into shape of a heart. Leave a little extra for twisting it closed when you're finished placing the burlap. The closure can be at any spot on the heart.

Step 2: Cut your burlap into several 2 1/2 inch strips. I used 6 strips for mine. Take the strips, and thread them (accordian style) onto the wire as shown below.
Do that for all the strips, and choose how full you want your wreath. After you've added the burlap you want, arrange it and decide where you want your rosettes. The rosettes will be placed permanently in their spots, so keep that in mind.

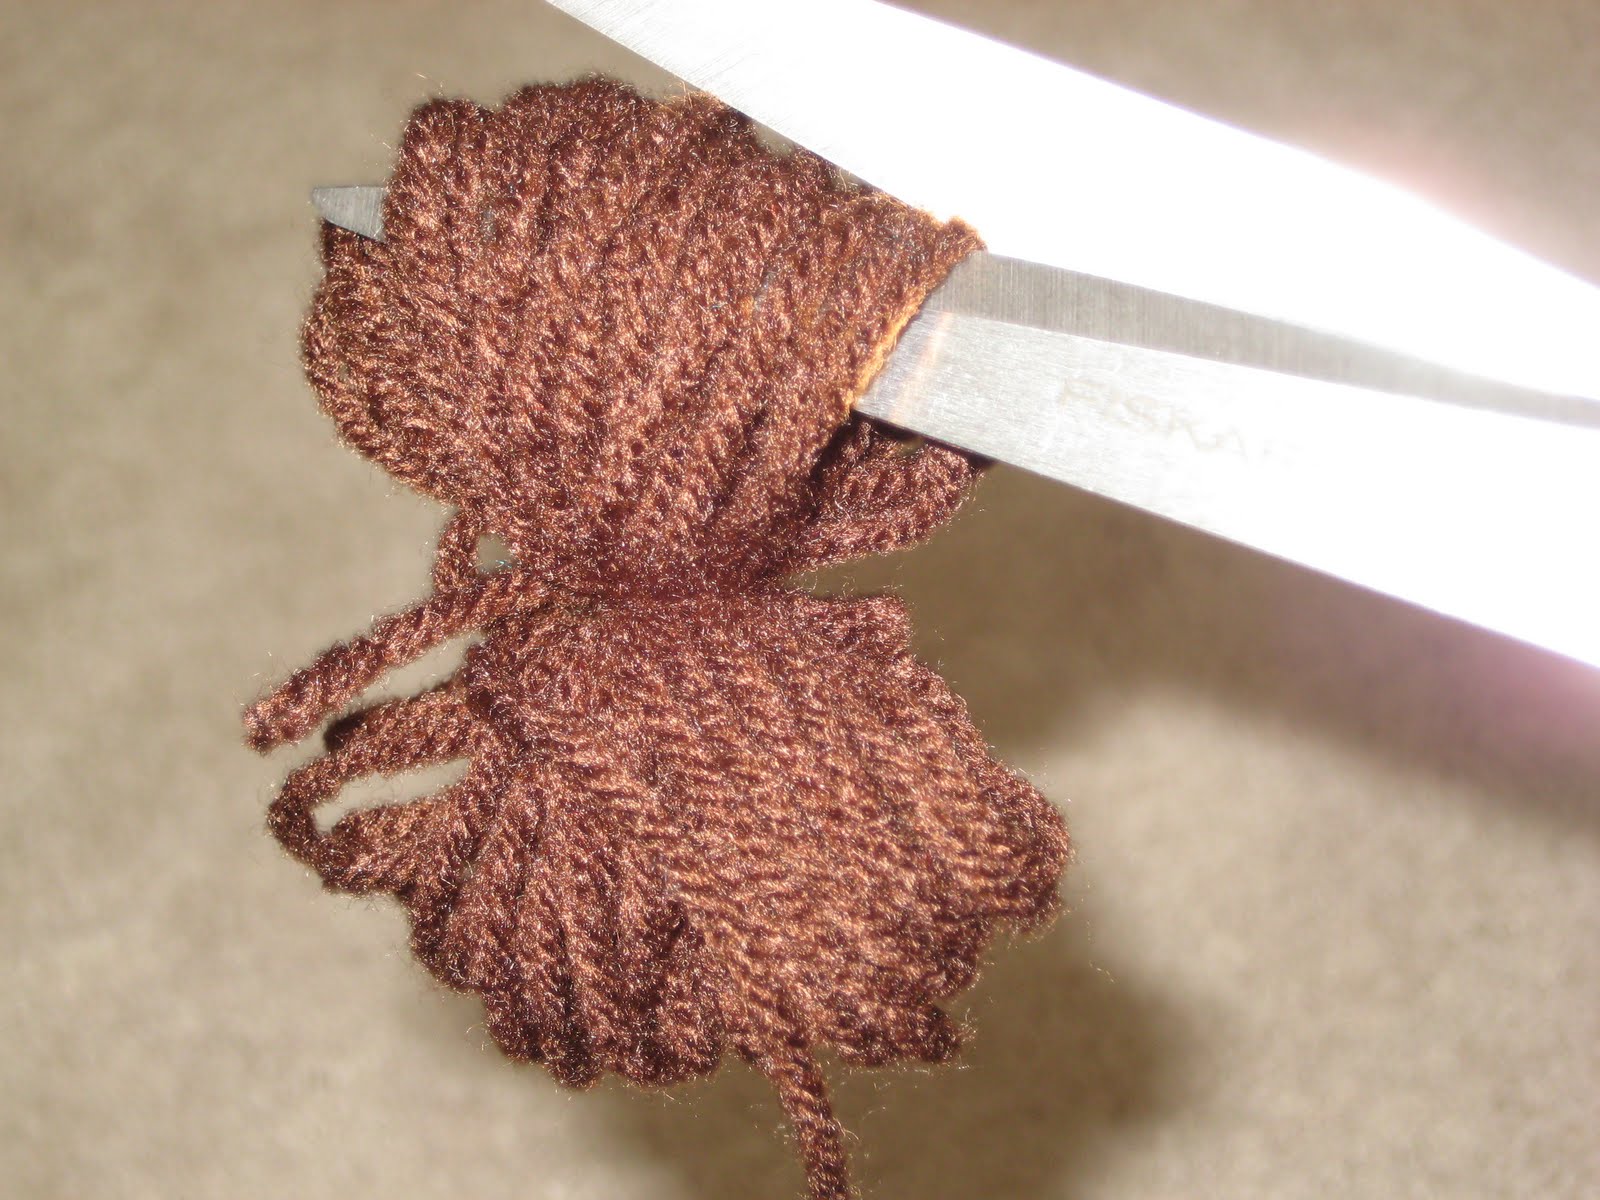
Step 3: Begin making your rosettes by taking one piece of felt, and cutting it into a large circle, using most of the rectangular sheet of felt. Then take that circle, and cut the edge into a random wave-like pattern all the way around. After you make the whole circle wavy, begin to cut about a half inch strip inside the circle, following the outside of the circle (only no waves this time). You'll cut the circle into a spiral. When you approach the end, stop cutting and leave a small circle of felt attached to the spiral.

Begin rolling the top of the spiral as shown below, and place dabs of hot glue along the way. Note that you have a wavy side of the spiral strip, and a flat edge. Be sure to line up the flat edge, as the bottom of the rosette.
When you get to the end (or desired size) of the felt, you'll come upon the circle you left uncut. Flap that over the bottom of the rosette as a cover.
Step 4: Spread the burlap flat on the desired spot of the wreath, and hot glue the rosettes to the wire and flat strip of burlap.
Step 5: Twist the wire closed, and wrap ribbon around the top of the heart, tie a bow, and hang up your wreath! Quick, easy, and fun! I linked up to Craft-O-Maniac, so check out the other great stuff over there!

12.10.2010

Jessica's Winter Wonderland Wreath

Here is Jessica's sparkly and fantastic version of the Modern 3D Wreath. I'm in love!

Isn't it absolutely stunning?


Beautiful job Jess!

Linked up at Craft-O-Maniac

11.17.2010

Modern 3-D Wreath

I fell in love with this wreath when I first saw it on this tutorial from Tatertots and Jello. I had to make it immediately! Her tutorial is great. When I talked to her about it, she gave me some extra tips I'll share with you!

Tips:
  1. Wrap your ribbon super tight around the wreath form. This will help the dowels hold the weight of the circles that are glued to them.
  2. Use the medium size and small size circles for the highest dowel pieces.
  3. Attach circles to dowels with gorilla clue, and dowels to wreath form/ribbon with hot glue.
Good luck, and enjoy!

3.23.2010

Springtime Wreath - Price: FREE!


My front door needed some love, so I made THIS!


This springtime wreath was made completely out of stuff I already had at home. I got a wire hanger and shaped it into a circle. Next, I cut a bunch of strips of fabric, pink burlap and felt I had laying around. The strips were about 5 inches long. I just tied them in knots all around the hanger. Last, I tied on the ribbon for hanging and some rick-rack for a little extra whimsy. So easy and SO cheap. Enjoy!

By the way, if you want to hang a wreath on your door without using a wreath hanger or putting a nail in your door, you should try these adhesive hooks. They are fab! Did everyone on earth already know these existed? I am a little behind the times.