Showing posts with label Quiet Book. Show all posts

4.30.2011

Quiet Book Project- Round II

Take a look at these beauties! I did a second round of the Quiet Book Project with my friends from college, and WOW, are they impressive!!!

I love all the different skills they focus on, and especially the imaginary play they promote!

Barn with animal finger puppets
By: Marek


Summer Tree
by: Nyoka

Clothesline and basket
by: Becca

Getting Dressed page
by: Janae


by: Tori
Finshing Pole with magnetic fish
by: Stacie

Monster with changeable faces
by: Mitzi

Ice Cream cones
by: Jan

Can you believe these?! Ridiculous! Thank you so much, girls. My kiddo's quiet book is now bursting with fun and gorgeous entertainment.


abc button


4.16.2011

Finishing Quiet Book Pages- Directions

My long-time and close friends from Ogden, UT made some exciting quiet book pages for which I'll be checking my mailbox at least 17 times a day until I get them! I can't wait to add them to my book!

Here's a quick tutorial with pictures of what I'm talking about for you cute O-Town girls!

Step 1: After making all reinforcements to the pages that you'd like, decide the order you'd like the pages to be in. Place two pages right sides together (be sure that you have them facing the right directions so that when you flip the pages right sides out, they aren't upside down).
Using a 1/4" seam, top-stitch down one length-side of the page, across one width-side, and up the other length-side.

Step 2: Flip the pages right sides out, and iron flat. Be sure to place a towel on top of the pages with felt, as the iron can melt the felt pieces. On the unstitched end of the page, fold the unfinished edges in, and iron flat. Begin to topstitch the top side, the outside edge of the page, and the bottom side of the page. When you get to the inside edge of the quiet book page (where your eyelets will be), finish your straight stitch, and begin a zig-zag stitch.

I used white thread on the page on the right, so you can't see the stitching very well. Look at the page on the right of this pic to see the stitching. Be sure to back-stitch at the beginning and end of the seam.
Step 3: After finishing all quiet book pages, begin setting your eyelets. Remember that I used:
  • 1 package of 15 Large Eyelets size 1/4" (6mm)- Dritz brand, silver color. You can buy a starter pack that includes the little eyelet tool for applying them to a page. I think one package is only like $3...
  • Book Rings- I got 2" size, and they're really big. I went big because I planned on adding pages to the book often, so it made sense to do that. I bought these in bulk at Office Depot, and we all just split the cost at the exchange party... Super cheap too.
When deciding where to place the eyelets, get a piece of notebook paper, place it over your finished quiet book page, and mark over the holes onto your page using a pencil. This gives you a uniform guide to use on all your pages.

Good luck girls! I can't wait to feature all your pages in an upcoming post!

3.07.2011

Peek-A-Boo Quiet Book Page

I have a problem. I'm obsessed with these quiet book pages! I recruited 14 crafty ladies for aquiet book group here in St Louis in December, and LOVED the result. So much, in fact, that I organized another group with friends from college and we're exchanging those pages next month. I can't wait to add to the book!

Here's what's been occupying my life, and dining room table for the last couple of weeks. A Peek-A-Boo page where you can switch out the pictures or flashcards in these vinyl pockets behind the shutters, chimney, windows, and door.


For the detail stitching on the shutters, I found a quick method (since I ended up stitching horizontal lines across 40 of these bad boys):
I fed each rectangle through the machine, one after another. The pic below shows how they're all in one long attached banner, and then I just trimmed the strings and detached them after. You have to be sure to backstitch at the beginning and ending of each line on each rectangle.


I'm thinking of adding a little something to the door for a doorknob. Other than that, all 10 pages are finished!

Now that these pages are complete, I can finally get back to focusing on St Patty's Day again!


12.02.2010

Complete Quiet Book... Just In Time For Christmas!

We've done it! It's been a 3 month process, and we met together on Tuesday night to exchange and assemble our pages. It was so exciting to see all the beautiful work and to see it all coming together! I recommend this to anyone thinking of doing a quiet book. See the end of this post for any details on our Quiet Book Project, and click here to see a tutorial on the QB cover.

Enjoy!

Button flowers: Amy


Jonah and the Whale (zipper whale mouth): Glori
Noah's Ark (snap ark door with animal slot): Tori


Street Scene (velcro garage): Jessica
Cupcake Decorating: Emily


Mailbox and Letters: Blair
Football Laving: Michelle


Treasure Chest (lock and key to open chest): Shannon
Weaving Strips: Sarah


Colorful Kites (snaps to matching color): Kadee


Shapes (snaps to matching shape outline): Jen
Barn and Finger Puppets: Natalie L.


Tic Tac Toe- Natalie M.


The idea was that we would all have 14 different pages for our children's quiet book, while only having to buy the materials and design one! We all made duplicates of one page. We had matching criterium, such as page size and medium. I set the completion date for 3 months, and I wouldn't recommend doing it in any less time since I actually enjoyed myself doing this-- taking my time, finding materials on sale, etc.

I love having this keepsake from several of my friends, and also that my children can benefit from all these girls' diverse creativity and talents! Thanks ladies-- they turned out even better than I had hoped for (sniff, sniff)!

11.10.2010

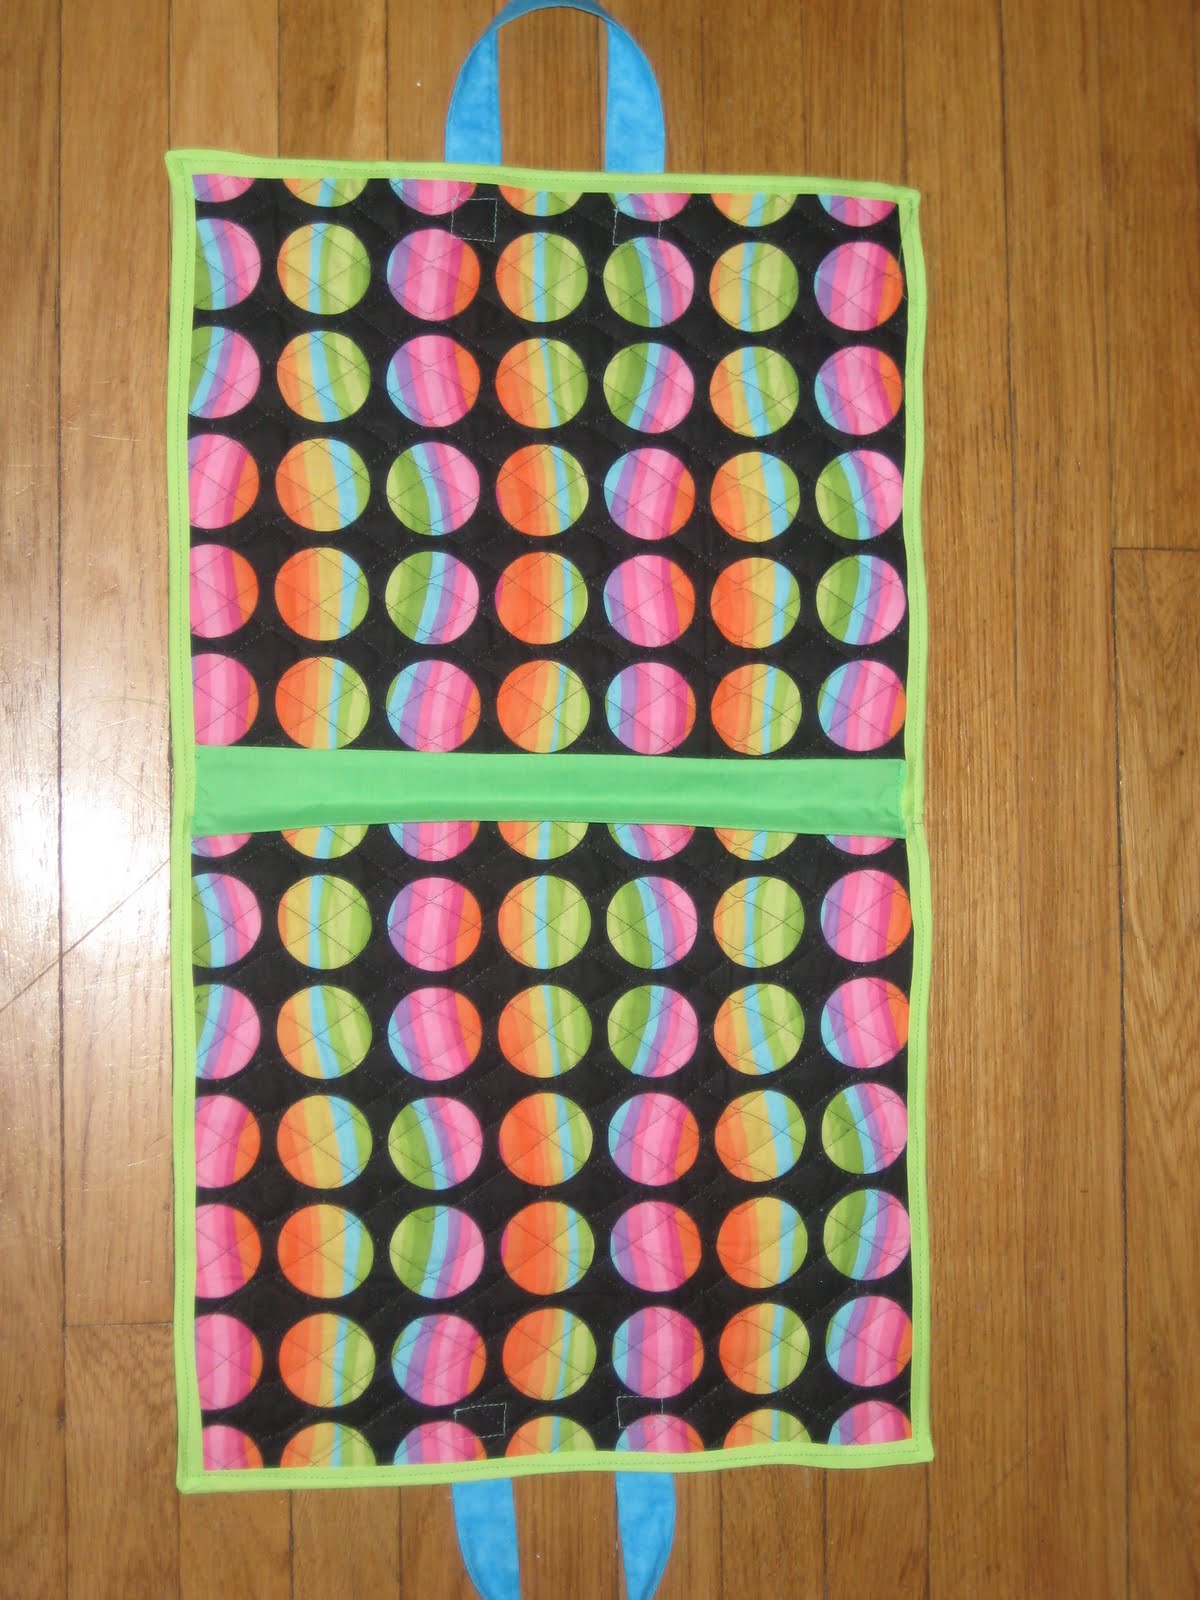
Quiet Book Cover

Hello! I'm Shannon's sister, Tori. When Shannon invited me to be a contributor on her craft blog, I began to hyperventilate. Then when the euphoria wore off, I came back to solid ground and began sewing! You see, Shannon is my hero and all my life I've been trying to be like her. Annoying, yes, but any of you who know her can understand why I'm obsessed with this gal.

A group of friends and friends-of-friends here in St Louis joined forces to create quiet books for our kids. This post is for the 14 girls working on this project that's due on the 30th of November. Here's my quiet book cover!

It was super easy to make, and here's what I used to make it:
  • 1/2 yd. of prequilted fabric (catch this on sale at JoAnn's or use a 40% off coupon)
  • scraps of coordinating fabric (for inside spine and handles)
  • 3 yards of bias tape (wide single fold)
  • thread
  • button
  • sewing machine
Assume a 1/2" seam allowance...

Step 1: For the book, where it's pages are 10.5" x 14," cut the prequilted fabric 25 3/4" x 14"

Step 2: Cut coordinating fabric 14"x 2". Fold and finish edges. ("spine")

Step 3: Cut coordinating fabric (two times) 12" x 1.5." Fold and finish edges. (handles)

Step 4: Fold prequilted fabric in half lengthwise, and iron crease to find middle of the book for the spine.
(sorry this picture is flipped- I don't know why it kept downloading it this way. This picture shows the green "spine" that the book rings will loop around to anchor the pages.)

Step 5: Attach "spine" binding to the inside of the cover, by stitching at the top and the bottom of the book (see above picture).
Step 6: Sew on binding strip, around the entire edge of the cover.

Step 7: To attach handles, lay bookcover open with with back of cover facing up (inside is facing down). On each 14" side of the book, measure 7" to find the middle. Then, measure 1" from either side of the 7" middle mark, and pin edges of finished 12" x 1.5" strip to cover. These are the handles! The handles should be topstitched to the outside of the book.

Step 8: Sew on remaining binding strip to 7" x 1.5" piece of prequilted fabric piece. (strap)

Step 9: Attach button to book and create button hole on strap.

You're done!

I hope this made sense. If it doesn't, please email me or make a comment...

Good luck!

dtcox04@gmail.com