11.17.2010

Modern 3-D Wreath

I fell in love with this wreath when I first saw it on this tutorial from Tatertots and Jello. I had to make it immediately! Her tutorial is great. When I talked to her about it, she gave me some extra tips I'll share with you!

Tips:
  1. Wrap your ribbon super tight around the wreath form. This will help the dowels hold the weight of the circles that are glued to them.
  2. Use the medium size and small size circles for the highest dowel pieces.
  3. Attach circles to dowels with gorilla clue, and dowels to wreath form/ribbon with hot glue.
Good luck, and enjoy!

11.10.2010

Quiet Book Cover

Hello! I'm Shannon's sister, Tori. When Shannon invited me to be a contributor on her craft blog, I began to hyperventilate. Then when the euphoria wore off, I came back to solid ground and began sewing! You see, Shannon is my hero and all my life I've been trying to be like her. Annoying, yes, but any of you who know her can understand why I'm obsessed with this gal.

A group of friends and friends-of-friends here in St Louis joined forces to create quiet books for our kids. This post is for the 14 girls working on this project that's due on the 30th of November. Here's my quiet book cover!

It was super easy to make, and here's what I used to make it:
  • 1/2 yd. of prequilted fabric (catch this on sale at JoAnn's or use a 40% off coupon)
  • scraps of coordinating fabric (for inside spine and handles)
  • 3 yards of bias tape (wide single fold)
  • thread
  • button
  • sewing machine
Assume a 1/2" seam allowance...

Step 1: For the book, where it's pages are 10.5" x 14," cut the prequilted fabric 25 3/4" x 14"

Step 2: Cut coordinating fabric 14"x 2". Fold and finish edges. ("spine")

Step 3: Cut coordinating fabric (two times) 12" x 1.5." Fold and finish edges. (handles)

Step 4: Fold prequilted fabric in half lengthwise, and iron crease to find middle of the book for the spine.
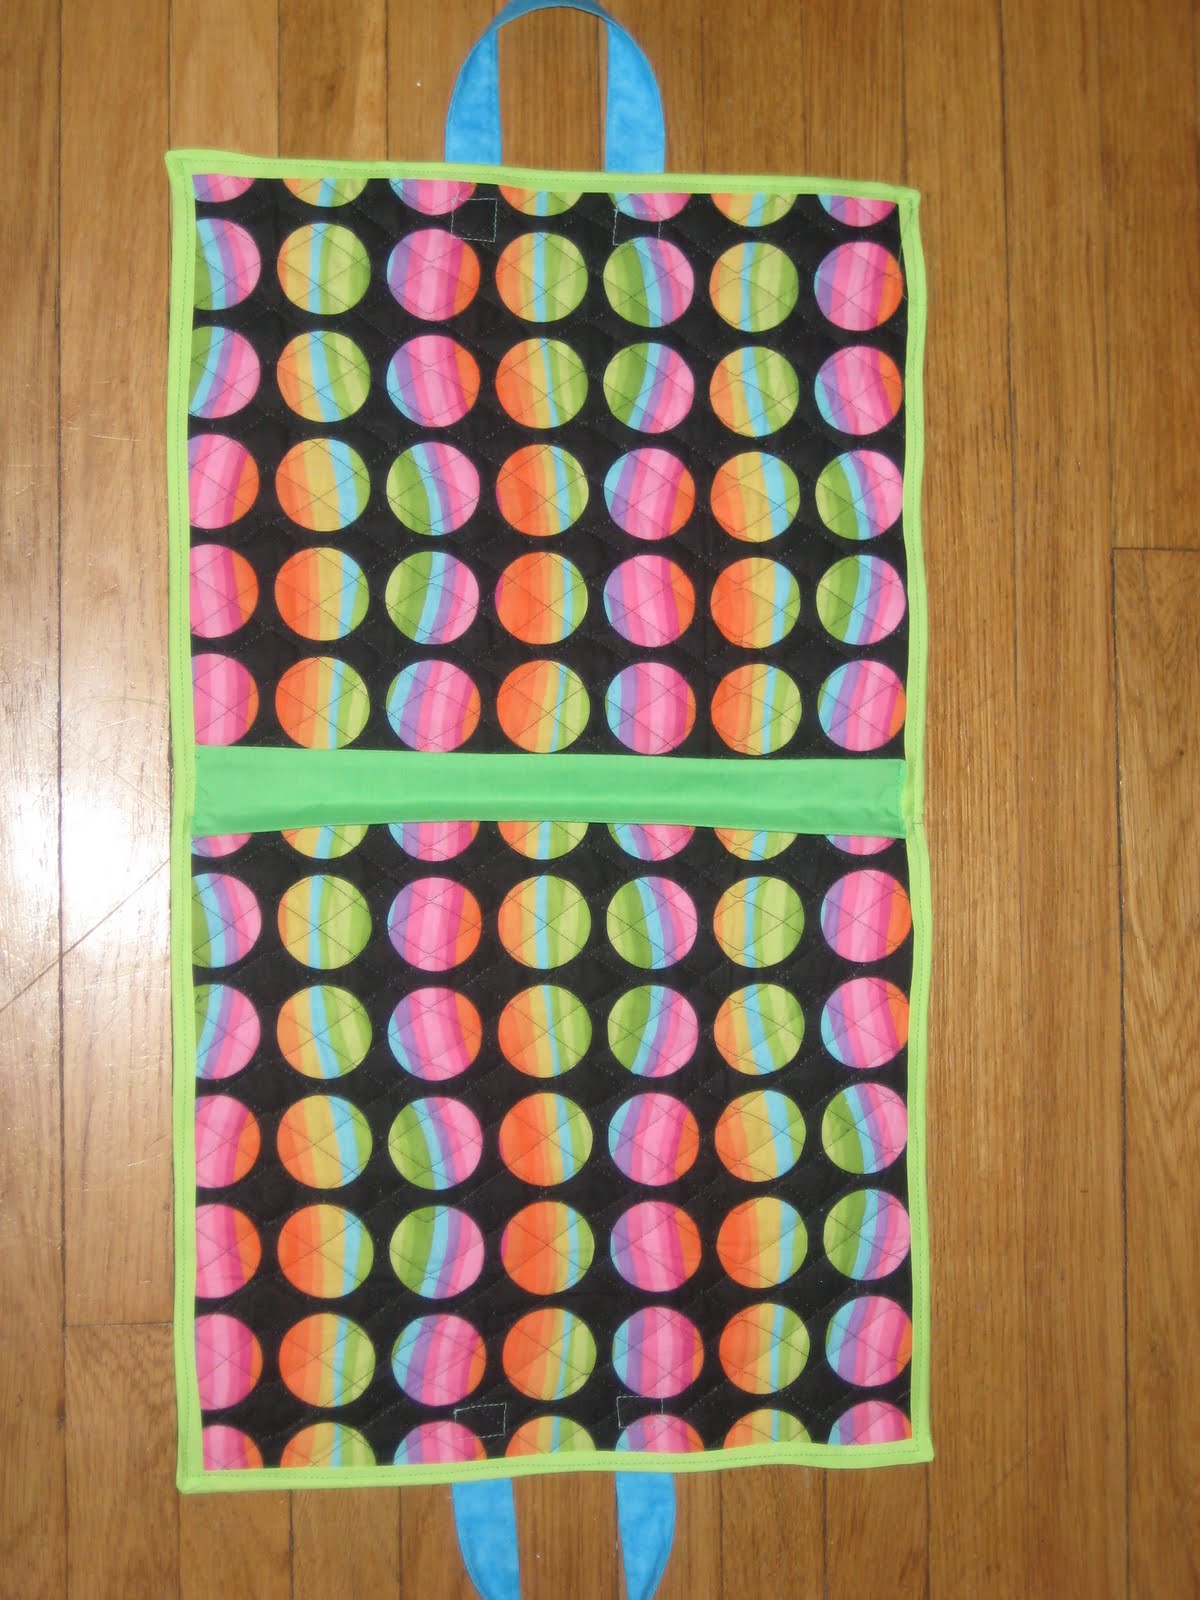
(sorry this picture is flipped- I don't know why it kept downloading it this way. This picture shows the green "spine" that the book rings will loop around to anchor the pages.)

Step 5: Attach "spine" binding to the inside of the cover, by stitching at the top and the bottom of the book (see above picture).
Step 6: Sew on binding strip, around the entire edge of the cover.

Step 7: To attach handles, lay bookcover open with with back of cover facing up (inside is facing down). On each 14" side of the book, measure 7" to find the middle. Then, measure 1" from either side of the 7" middle mark, and pin edges of finished 12" x 1.5" strip to cover. These are the handles! The handles should be topstitched to the outside of the book.

Step 8: Sew on remaining binding strip to 7" x 1.5" piece of prequilted fabric piece. (strap)

Step 9: Attach button to book and create button hole on strap.

You're done!

I hope this made sense. If it doesn't, please email me or make a comment...

Good luck!

dtcox04@gmail.com

10.02.2010

Creepy Crawly Candy Containers

Halloween is one of my favorite days of the year so I love decorating for it. I needed a candy jar to display the cute and colorful candy corns. Do you like what I came up with?


I bought everything at Walmart. The entire project cost about $3.50.
I love the jars they sell at Wally so I grabbed one. I also bought google eyes, felt, pipe cleaners, ribbon, and of course, the CANDY!

First, I cut a oval out of the black felt.
Next, I hot glued a black pipe cleaner around the oval to make the spider look furry.
Then, I cut 2 pipe cleaners in half and shaped them to be the spider legs. I glued the legs to the back of the felt with hot glue.
After that, I hot glued on the eyes.
Once the spider was ready, I hot glued the entire spider to the jar.
I finished by embellishing the jar with the cute ribbon.
I love it!


Creepy Cookies

I love decorating cookies for the different holidays. Fortunately, I had lots of time today to do just that! Which one is your favorite?

7.01.2010

Patriotic Canvas

I got the inspiration for this patriotic subway art here. I did mine a bit different. Side note: Why is everything I type underlined???


I made some fake canvases out of foam board. Next I cut red and white card stock and modged it to the foam board.


While the fake canvas dried, we busted out the CRICUT and cut out some patriotic images and sayings from various cartridges.


Once the modge dried, we started sticking those vinyl images to the foam board.


Ta-Da! Happy 4th!

Patriotic Cookies

They're not perfect, but they will do.... :)


Studly Boys Velcro Ties


For a long time now, I have been wishing that I knew how to make cool ties for my little guy. I am so glad that I stumbled upon this awesome tutorial. It's sew easy. (chuckle, chuckle)